
From time-to-time, some of us spend our valuable time to create favourites in our web browsers, thinking that in the long run, our working life will be easier!
To be honest, if you can devote the time to do this, it does make one’s job easier when accessing websites, because you can just click the favourite link, rather than having to type in the full URL! Some of us, who you would class as computer nerds, setup as many as we can, so that we can “show off” to others in the office, at how quickly and easily we can navigate to our favourite websites.
When we built Nimbus, we thought "would it not be a great idea to allow staff to create their own favourite views in Nimbus?" . If you think about where you spend most of your time in your Nimbus system, it would be "Clients", "Contacts", "Documents" and possibly "Email Jobs".
To save you the time of having to re-do the same filters each day on your Nimbus grids in order to find information, you can create your own favourite "Views". Once, you have setup a favourite View, you can then easily recall it from a drop-down list.
The functionality is similar to how you pin a particular folder location to your quick access menu in File Explorer on your PC, or like bookmarking a website in your browser. The expected behaviour of the two examples mentioned, is to remember what you have saved and then allow you to quickly access the same information, time and time again. This, then allows you to easily switch between your saved Views, as this is the fastest way to get to your favourite data sets that you want to work with.
Any Nimbus user who needs to view certain Clients, Contacts, Documents or Email Jobs on a regular basis will benefit from using Views. For example; there is a group of Clients you will be corresponding with regularly. This is the perfect time to create a favourite View on your Client grid. You would setup the Client grid to show the information you require, including any filters, and then you would save the View. Once saved, you can then recall the View whenever you need to bring up that Client group. Spending the time to setup the View will give you quick and easy access to it in the future, saving you a lot of time moving forward.
If you have an awesome View that all staff would like to use, you can push this View to all Nimbus users
with one check box. There is no need for IT to assist with doing all that behind-the-scenes IT stuff, how good is that? (Just remember only staff with Admin access can do this).
Any time you require to filter down to a particular set of clients, contacts, documents or email jobs is a good time to use Views. Another good example of when using Views can significantly improve your workflows, is if your business sends out a monthly newsletter to the same clients, for example. You could filter your Client grid to only show those clients, save a new View, and then moving forward, when you create an Email Job, all you need to do is select the saved View and run the Email Job!
As a Nimbus user, you will see significant benefits from using Views:
We have implemented Views in Nimbus to make your work life easier and to save you time, all the more reason for you to utilise it!
Creating your favourite views is easy as 1 - 2 - 3!
Step 1:
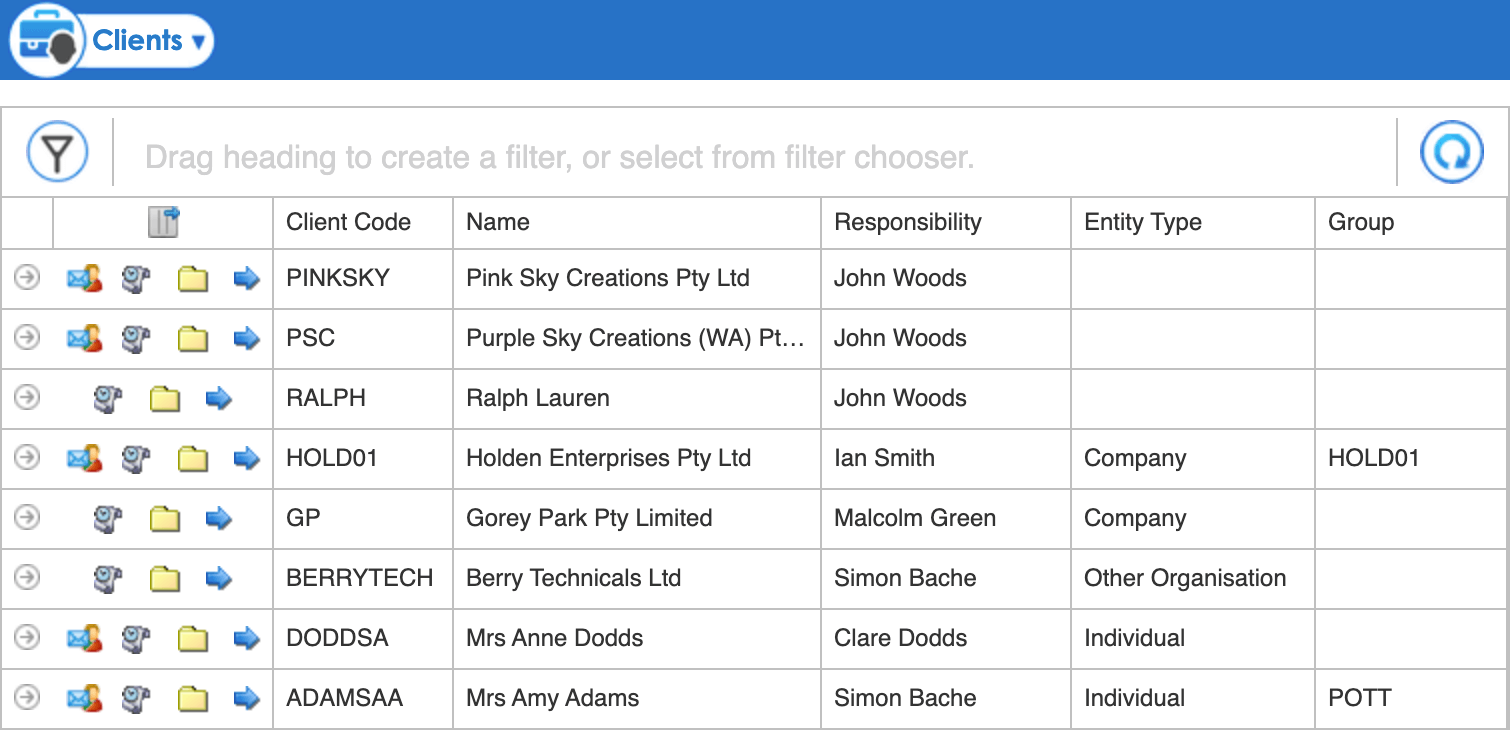
From your data grid, choose what data to display. Here we have selected the Client grid, but remember you can create a filter on the
Clients, Contacts, Documents and Email Jobs grids as well. We have included the Client Code, Name etc, but you can include any column
information you require and remove those columns that you don’t need.
Step 2:
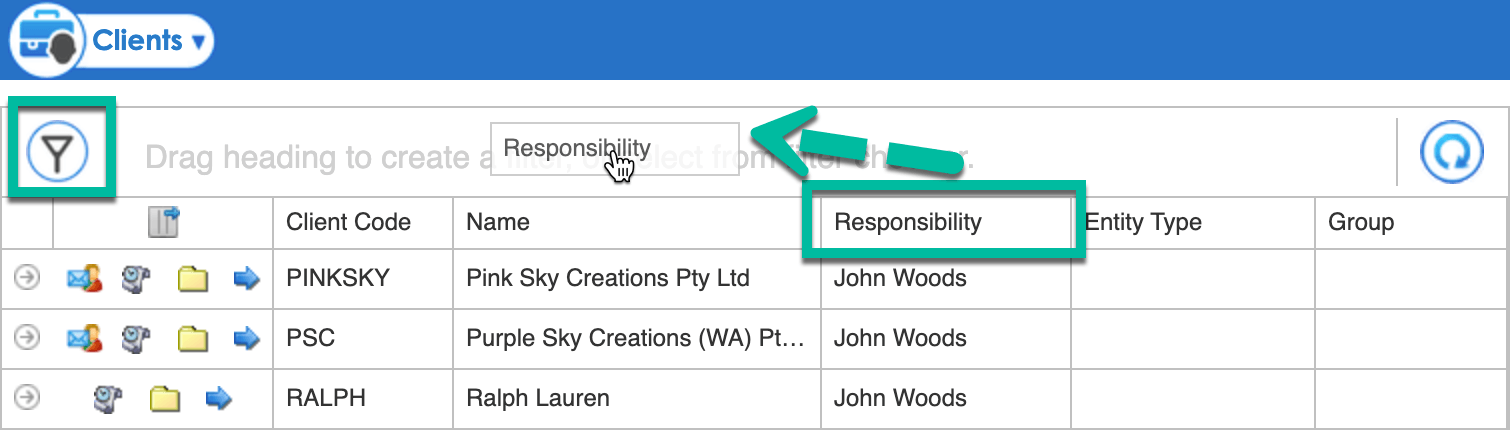
Set the Filter/s on the Grid. To add a filter field, use the funnel icon on the top left of the screen, if the column information is NOT
displayed in the grid.
If the information is shown on the grid, you can use your mouse to drag the heading up to the Filter field.
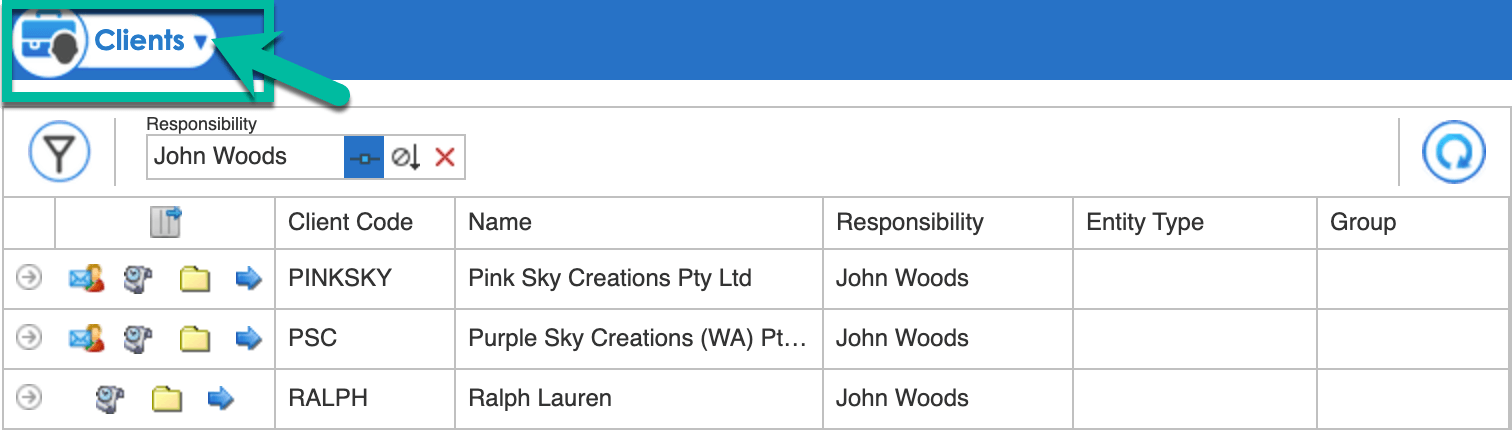
Then enter the information you would like to filter:
Step 3
To save the filtered results as a View, click the drop-down button shown on the Toolbar.
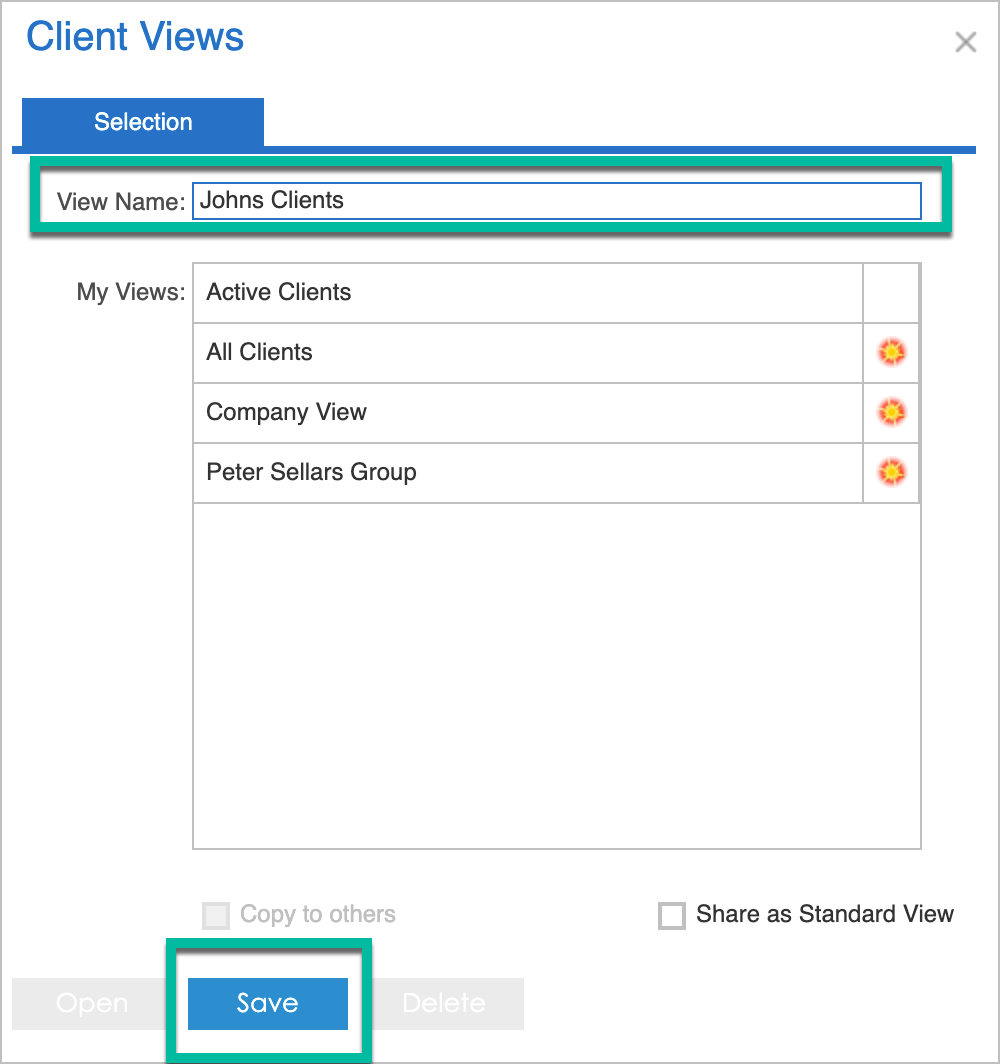
Name the View and click Save.
What if I need further help?
Drop us an email via our support channel and we will contact you to provide assistance.
If you are looking for a cloud document management system with view customisation or if your current system does not give you enough flexibility, contact Nimbus Portal Solutions and request a demo today to learn about how we can help you improve and streamline your daily workflows.